

You can spend hours blending armour, picking out buckles and persuading a pair of eyes to look in roughly the same direction. Leave one raised mould line running over a shoulder pad, however, and that is where the light will land. That is why knowing how to remove mould lines from miniatures matters: it is a small preparation job with an annoyingly large influence on the finished model.
For most plastic miniatures, the safest approach is to scrape the mould line away gradually with a dedicated mould-line remover or the back edge of a suitable hobby blade. Use short, controlled strokes, support the component close to the area you are cleaning and stop as soon as the ridge is level with the surrounding surface. Files and fine abrasives have their place, particularly on metal, resin and broad flat areas, but there is one rule worth remembering throughout this guide: remove the ridge, not the model beneath it.
That sounds obvious until a faint line refuses to disappear from a curved helmet and one last pass turns into three. The real skill is not removing material. It is knowing which material is unwanted, choosing the gentlest tool that will shift it and recognising when the job is finished.
The Bomran Guide
Guide type: Miniature preparation tutorial
Best for: New and returning wargamers and model builders
Covers: Plastic, resin and metal miniatures
Key principle: Remove the ridge, not the model beneath it
Estimated reading time: 14 minutes
Related guide: Essential model-making tools for beginners
What is a mould line?
A mould line is the fine ridge that can be left where sections of a production mould meet. On an unpainted component it may look almost too slight to worry about. Once the model has a uniform coat of primer, the ridge catches the light and becomes much easier to see.
You may also see it written as “mold line”, particularly in US guides and product descriptions. The spelling changes; the unwanted ridge does not.
Later painting stages are even less forgiving. A wash can settle beside the ridge and outline it. Drybrushing catches the raised edge. A carefully placed highlight may end up competing with a second, entirely accidental highlight travelling over the model.
This does not mean every component needs a forensic examination. On gaming miniatures, concentrate on exposed areas such as faces, helmets, shoulder armour, weapons, hands and the upper surfaces of cloaks. Display models reward a more methodical inspection, but there is little glory in polishing a surface destined to disappear beneath a base or inside a closed vehicle hull.
Mould line, flash, sprue mark or assembly seam?
Before reaching for a tool, make sure you are looking at the right problem. Hobby terminology is not always used consistently, and several different marks are regularly bundled together as “mould lines”.
| Mark | How to recognise it | Usual treatment |
|---|---|---|
| Mould line | A fine ridge following the meeting point of the production mould | Controlled scraping, followed by fine smoothing if required |
| Flash | A thin film or fin of surplus material, more common on some resin and metal castings | Remove the excess carefully, then refine the remaining edge |
| Sprue or gate mark | A localised nub where a plastic component was attached to its frame | Remove the part from its sprue safely, then trim and smooth the remaining nub |
| Assembly seam | A join between two separately assembled components | Improve the fit, bond the parts and fill or smooth the join where necessary |
A scraper is intended to take down a narrow raised ridge. It cannot correct a poorly fitted joint, and it is not the ideal tool for removing a substantial sprue attachment. Diagnose the mark first and you are far less likely to solve a small problem by creating a larger one.
Choosing the right tool
A purpose-made mould-line remover is the natural starting point for ordinary plastic components. It gives you a scraping edge without an exposed cutting edge, which is reassuring for beginners and convenient when cleaning a whole unit. A narrow profile is especially useful around smaller details and awkward recesses.
The EXPO Micro Mouldline Remover is a good example of the form. There is no sorcery involved. Its value lies in putting a slim, controllable scraping edge in your hand and reducing the temptation to attack a slight ridge with something more aggressive.
A hobby knife is more versatile. The back, non-cutting edge of a suitable blade can scrape plastic, while the sharp edge can shave heavier material and reach very tight areas. That versatility brings risk with it. A blade that can clean a collar or fingertip can just as readily gouge the sculpt or slip into the hand holding it. Stabilise the component, keep your fingers outside the tool’s path and never make extra pressure compensate for a blunt or unsuitable blade.
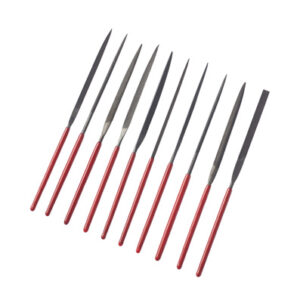
Needle files come into their own on metal, some resin parts and firm, accessible surfaces. Shape matters. A flat file suits a flat plane, a round file reaches a concave recess and a half-round profile is a useful compromise. Files remove material quickly and may leave scratches of their own, particularly on softer plastic, so they are better treated as shaping tools than the automatic answer to every faint ridge.
Fine abrasive paper or a modelling sanding stick is useful for blending a cleaned area. It works best where it can follow the surface without flattening it. A small piece wrapped around a suitable support offers more control than a loose scrap rubbed with a fingertip. Around crisp edges or raised texture, however, an abrasive can soften exactly the detail you were trying to save.
| Situation | Sensible starting tool |
|---|---|
| Ordinary line on a plastic limb or torso | Dedicated mould-line remover |
| Very tight plastic detail | Narrow scraper or carefully handled hobby blade |
| Flat metal surface | Fine flat needle file |
| Concave recess | Round or half-round needle file |
| Light marks left after scraping | Fine abrasive used sparingly |
| Heavy flash | Remove the surplus first, then refine the remaining edge |
Useful tools for miniature clean-up
You do not need a workbench full of specialist gadgets for this job. A slim mould-line remover covers everyday plastic preparation, a compact needle-file set gives you useful shapes for metal, resin and awkward contours, and a cutting mat provides a stable, sacrificial surface when a blade or file enters the job.
-
Expo Tools Micro Mouldline Remover 74601
£4.95 -
Expo Tools 10pc Miniature Needle File Set 72536
£8.95 -
Expo Tools A3 Self-Healing Cutting Mat 450 × 300mm 71203
£10.00


How to remove mould lines from plastic miniatures
Begin under a strong light and rotate the component rather than relying on one view. A line that vanishes head-on often announces itself as soon as light travels across the surface. Running a fingertip gently over the area can reveal a ridge your eyes have missed.
Before you begin, place the model on a stable work surface and keep a small dry brush nearby for clearing away shavings. Good light, a supported component and an unobstructed tool path matter more than speed.
- Support the part close to the working area. Long weapons, ankles and aerials can flex or snap when pressure is applied at the unsupported end.
- Place the scraping edge across the ridge. You are shaving down the high point, not cutting a trench beside it.
- Use short, light strokes. Adjust the tool as the surface changes rather than dragging it around an entire curve at one angle.
- Brush away the debris and inspect again. Look from more than one direction and feel for any remaining ridge.
- Refine only when necessary. If scraping has left a visible mark on a broad surface, a suitably fine abrasive can blend it with minimal pressure.
Most accidental damage happens after the mould line has effectively gone. The modeller sees one pale mark, assumes it is still raised and gives the area another enthusiastic pass. Sometimes that pale mark is merely a change in the sheen of the plastic. Trust your fingertip and the angled light rather than continuing until the surface looks the same colour.
Whether components are best cleaned before or after removal from the sprue depends on access. The frame can provide a useful handle, but the gate may conceal part of the mould line and the sprue itself may block the tool. Clean what you can comfortably reach, remove the component correctly and inspect it again before assembly.
Working around faces, fur and fine detail
A line across a plain shin guard is an easy afternoon. A line wandering over an eyebrow, through a lock of hair and down the edge of a collar is where patience earns its keep.
On faces and hands, work in very short sections. Clean up to an eye, lip or finger, turn the component and continue from the other side. Do not drag a tool across important detail simply because the mould line continues in that direction. A tiny remnant tucked into a shadow is usually less damaging than a flattened eyelid.
Hair, fur and chainmail need the same judgement. Follow the existing texture where possible, lifting the line from the raised areas a little at a time. If the ridge crosses a deep recess, the aim is to preserve the sculpt, not excavate every last trace under magnification.
Curved armour and rounded weapons invite another common mistake. A broad flat file can turn a smooth curve into a collection of small flats before the change becomes obvious. Follow the contour with the tool, inspect it repeatedly and pay particular attention to the silhouette. On a sword blade or armour rim, preserve the intended edge rather than rounding it over with abrasive paper.
This is also where tool access should influence assembly. Cleaning the inside of a cloak or the underside of an arm is considerably easier before the two are glued against a torso. A quick dry fit tells you which areas will remain visible and which will become unreachable.
Removing mould lines from resin and metal miniatures
Plastic technique should not be copied blindly onto every material.
Resin rewards a lighter hand and a tidier desk. Cast resin can be brittle, and its behaviour varies between manufacturers and formulations. Support thin parts while working and begin cautiously with a scraper where appropriate. Reserve files or abrasives for material that will not lift cleanly.
Cutting, filing or sanding resin can create dust. Follow the miniature manufacturer’s safety instructions, work in a well-ventilated area and use the recommended protective equipment. Damp sanding may help control dust where it is suitable for the particular material and task. Do not blow the residue across the desk or allow it to collect among painting equipment.
Some cast-resin models also need washing gently in warm, soapy water before assembly and painting to remove release residue. Follow the instructions supplied with the miniature rather than assuming every casting and 3D-printed resin requires identical treatment.
Metal usually calls for a file. A fine needle file will make more useful progress than trying to force a plastic-style scrape through a stubborn line. Match the file to the contour and use controlled strokes that preserve the form around the ridge. Thin flash may need careful removal before the remaining edge is smoothed.
Wear suitable eye protection when clipping material that could fly away, and follow the manufacturer’s guidance when cutting or filing. Metal filings have no business sharing the wet palette.
Mistakes worth avoiding
The first is confusing force with progress. If a tool only works when you lean your weight into it, reconsider the tool, angle or material. Several gentle passes are easier to control than one grand gesture followed by a small crater.
The second is treating every surface as flat. A file that behaves beautifully on a tank panel may quietly ruin a forearm or shoulder pad. Match the tool to the contour and watch the silhouette as closely as the mould line itself.
Then there is the hope that primer will hide whatever remains. Primer is not that charitable. By giving the model one consistent colour, it reveals changes in height that were harder to see on bare material. Washes and drybrushing then make the evidence even clearer.
Finally, do not spend display-model effort on an invisible surface unless the process itself gives you pleasure. For a gaming army, concentrate on the areas that catch the eye and light. Sensible preparation is not corner-cutting. It is knowing which corners anyone will actually see.
What if you find a mould line after priming?
Welcome to the club. Primer is mercilessly good at finding the one line that escaped inspection.
Let the primer cure according to its instructions. Scrape or sand the affected area carefully, feathering any hard edge in the surrounding primer. Remove the debris and reapply a suitable light coat of primer to the exposed area before continuing with the paint scheme.
Do not keep painting in the hope that several more coats will level the ridge. They are far more likely to preserve it beneath an increasingly elaborate finish.
Do you need a dedicated mould-line remover?
Not necessarily. An experienced modeller with a suitable hobby knife, a few files and good control may already have everything required. A dedicated remover becomes worthwhile when you want a straightforward scraping tool, prefer not to use an exposed blade for routine preparation or regularly clean batches of plastic miniatures.
For a beginner, it is easy to recommend because both its purpose and its limitations are clear. It encourages scraping rather than slicing. For an experienced builder, a slim remover remains convenient for the unremarkable lines that make up most of the work.
No single tool replaces the others. A compact preparation kit might contain a mould-line remover for general plastic work, a carefully handled knife for precise trimming, one or two needle-file profiles and a fine abrasive for final refinement. Build that selection around the models on your desk, not every possible emergency that might one day arrive there.
Frequently asked questions
How long does it take to remove mould lines from a miniature?
An ordinary plastic infantry model may need only a few minutes, while intricate resin or metal castings can take considerably longer. Complexity, material and the position of the mould line matter more than the size of the model. Work until the ridge is level rather than treating the job as a race.
Should you remove mould lines before priming?
Yes. Remove them during preparation and inspect the model under angled light before priming. Correcting a missed line afterwards means disturbing the primer and preparing that area again.
Is a mould-line remover better than a hobby knife?
A dedicated remover is generally easier to control for routine scraping and has no exposed cutting edge. A hobby knife is more versatile and can reach intricate areas, but it demands greater care. Many experienced modellers use both for different jobs.
Can you use a file to remove mould lines?
Yes, particularly on metal, some resin components and accessible flat surfaces. Choose a profile that matches the shape and work gently. A file may be unnecessarily aggressive for a faint line on soft plastic.
Can you remove mould lines after assembling a miniature?
You can, and assembly sometimes makes it easier to judge what will remain visible. Arms, weapons and overlapping components may obstruct access, however. Cleaning obvious lines before assembly and performing a final check afterwards is usually the practical approach.
Can a mould-line remover be used on 3D-printed miniatures?
It may be useful on some printed parts, but a 3D print is more likely to have support marks or layer artefacts than a conventional mould line. Printed resins vary and may be brittle. Follow the material manufacturer’s handling and safety guidance, and test the tool cautiously on an inconspicuous area.
A better paint job begins before the paint
Mould-line removal will never be the story you tell people about a finished army. Nobody gathers around a display cabinet to admire the afternoon when you scraped thirty plastic elbows. Yet this quiet preparation allows everything that follows to look more convincing.
Return to that shoulder pad from the beginning. Once the model is primed and the light crosses the armour, there should be nothing there except the shape the sculptor intended and, eventually, the highlights you choose to paint. That is the reward: not a visible technique, but the complete absence of something that would otherwise have stolen the eye.
Explore Bomran’s model-preparation tools, or return to our brushes and hobby tools guides for more practical advice at the workbench.